Thursday, March 26, 2009

How to resize a partition in Windows Vista

Because programs such as Partition Magic don’t work on Windows Vista, some of you may be wondering how to resize partitions without losing any data. The good news is that you probably won’t be needing those programs because Windows Vista can manage your partition resizing.


To resize a partition with Windows Vista, follow these steps:

Be sure to back up any valuable information, because there is a slight chance that data can be lost when dealing with partitions.

1) Click on the Start menu

2) Right click on Computer and click on Manage

manage

3) You may get a User Account Control dialog here; just click Continue

4) In the left pane, open up the Storage category and click on Disk Management

storagetodisk

5) Here, you will find your partitions for your disks. Right click on the partition you’d like to modify.

partitioning

6) Click on Extend Volume or Shrink Volume to extend or shrink the selected partition.

If this doesn’t work for you because some options were greyed out, you can check out this post for an alternate method.

Sunday, March 22, 2009

Add Internet Explorer Icon to Windows Vista Desktop

I know what you are thinking. Can't I just make a shortcut? Of course you can. But using this tweak you can recreate the native Internet Explorer icon the way it used to be in prior versions of Windows.

The native icon gives you two benefits: First, you can right-click and get directly to the Internet Options panel, and secondly it doesn't have the shortcut icon arrow.

Manual Registry Tweak

Open up regedit.exe through the start menu search or run box, and then browse down to the following key:

[HKEY_CURRENT_USER\Software\Microsoft\Windows\CurrentVersion\Explorer\
HideDesktopIcons\NewStartPanel]

enableieicon.png

Find the key named "{871C5380-42A0-1069-A2EA-08002B30309D}" on the right-hand side, and then set the value to 0. If the key does not exist, then create a new 32-bit DWORD value with the same name. To remove the icon, you could set the value to 1 instead.

Note that if you are using the classic start menu, you should create this value under the ClassicStartMenu key instead of the NewStartPanel key.

Download Registry Hack

Even easier, you can just use one of the registry files I've prepared. Just unzip and double-click to enter into the registry.

Add IE Icon to Desktop

Remove IE Icon from Desktop

Thursday, March 19, 2009

Show Your Name In Vista Taskbar

go 3D

Wednesday, March 18, 2009

Windows Vista Repair Options

Windows Vista does not contain a Recovery Console, therefore doing a repair install like that we are familiar with in Windows XP is not possible. Instead, if you need to replace the operating system, you either have to re-install Vista from scratch, or else re-image the drive from a backup source created using the Windows Vista Backup Status and Configuration application. this then effectively replaces the current copy of Windows Vista with a shadow copy you backed up previously.

This backup option is the only one provided by Windows Vista. of course there are other ways of imaging your hard drive, but these require the user to purchase a third party application.

Of course, re-imaging is one option. If, however, you are simply experiencing startup problems or perhaps you cannot readily access your system and need to do a system restore, then you need to look at Windows Vista's Repair Your Computer options.

How you access the repair options will depend upon whether you have a Windows Vista installation disk or whether your operating system came pre-installed by your PC manufacturer.

Windows Installation Disk

NOTE

With the Complete PC Restore Option you must have made a backup of your system, either on your hard drive or on a set of DVDs, in order to use this option. If you don't have a backup then don't use this option

1/ make sure your PC can boot directly from the Vista DVD. Obviously, most modern PCs can. With older machines you may need to check the PC's BIOS

2/ Start the PC

3/ Immediately insert the Windows Vista DVD into the DVD drive

4/ A Black screen will appear with the words 'Press any key to boot from CD or DVD'

5/ Press Any key to start the booting process

6/ A new screen will now appear with a progress bar. The legend say's 'Windows is loading files'

7/ After a few minutes the Microsoft copyright window ill appear and another small progress bar will be visible

8/ You will next see a Blue curtained screen

9/ After a short while the Language option screen will appear

10/ Select your language and keyboard language and the Click the Next button

11/ At the bottom left of the next screen - the Install screen, Click on the Repair Your Computer option

12/ The System recovery options will now search for your Windows Vista installation

13/ Once the Vista installation has been located, Highlight it and then Click the Next button

14/ You are now presented with the following set of recovery options

  • Startup repair - This automatically fixes problems that are preventing Windows from starting
  • System Restore - This will Restore Windows to an earlier point in time
  • Windows Complete PC Restore - This will completely restore your entire PC - programs, system settings and files - from a back up that you have previously created (Available in Windows Vista Business, Enterprise and Ultimate editions only)
  • Windows Memory Diagnostic Tool - This checks your computer's memory hardware for errors
  • Command Prompt - This opens a Command Window

15/ Click on the Option you require and follow the onscreen prompts

Pre-Installed Options

NOTE

If no repair options are available your PC manufacturer may have replaced the tools or customised them. Check your Computer Manual before proceeding.

1/ Start your PC

2/ If your PC has one operating system Press and Hold the F8 key as your PC starts. If the Windows Logo appear you will need to start again

3/ If you have a dual boot system a Boot option menu will appear. Highlight the Vista operating system and Press the F8 key

4/ In both cases, if all has gone well, an Advanced options screen will now appear

5/ Highlight the repair Your Computer option and Press Enter

6/ Select a keyboard layout, and then Click the Next button

7/ Next select your user Name and Enter your Password, then Click OK

8/ The recovery options should now appear

Thursday, March 12, 2009

Make menu load faster

A simple registry tweak will allow you to speed up the menu. First load the registry editor by launching regedit from the Run menu (Press WINDOWS KEY + R to access the run menu).

Then, navigate to HKEY_CURRENT_USER\Control Panel\Desktop in the side panel, then right click on MenuShowDelay and select Modify.

Now, enter the menu delay time in milliseconds (1 is near instant, do not enter 0!) and press OK

Once you have restarted your menus will slide at near instant speeds. The default setting is 400 should you wish to restore the default menu setting.

Wednesday, March 11, 2009

Vista Task Manager

Loading the task manager in Windows Vista is a little different to Windows XP(where pressing CTRL + ALT + DEL would load it). Pressing this key combination now brings you to a task screen where you can perform a few system commands, including loading the task manager.

Simply press CTRL + SHIFT + ESC to load it instantly, much easier than right clicking on the taskbar to load it.

Wednesday, March 4, 2009

Disable Hibernation & delete the Hibernation file

Windows places a file on your hard drive that it uses when your computer goes into hibernation mode. If you do not use hibernation mode, or your computer does not properly support it, you may want to disable hibernation and clear the file off your hard drive to free up some space (the file will use as much space as you have in physical memory, so if you have 1GB of RAM, it’s going to use 1GB of your hard drive space).

Disable Hibernation:

1. Click Start, All Programs, and then right click on "Command Prompt".

2. From the context menu click on "Run as administrator".

3. If User Account Control prompts you to allow the action, click on Continue.

4. In the command prompt window, type "powercfg –h off" (without the quotes).

5. Close the Command Prompt window.

Delete the Hibernation File:

1. Click Start, All Programs, Accessories, System Tools, and then click "Disk Cleanup".

2. If prompted to choose a drive, select the drive in which Windows Vista is installed on to and press OK.

3. Disk Cleanup will scan the hard drive and present you with a list of options.

4. Check "Hibernation File Cleaner", and then click OK.

5. When asked "Are you sure you want to permanently delete these files?" click on the Delete Files button .

This and more articles can be found at: http://blog.symbiancentral.com

Verify the Integrity of Windows Vista System Files

Windows Vista includes a utility that will scan your system for corrupt, changed or missing system files. Running this from the command prompt is much easier than booting off the dvd into repair mode. To run this utility, you will need to open a command prompt in administrator mode. You can do that by right clicking the Command Prompt in the list and choose "Run as Administrator" Once you have an administrator command prompt open, you can run the utility by using the following syntax: SFC [/SCANNOW] [/VERIFYONLY] [/SCANFILE=] [/VERIFYFILE=] [/OFFWINDIR= /OFFBOOTDIR=] The most useful command is just to scan immediately, which will scan and attempt to repair any files that are changed or corrupted. You can run that command with this command: sfc /scannow

Using System Restore in Windows Vista

There are two places that you can use the system restore feature from. From within Windows, you can just type restore into the Start menu search box, and you’ll immediately see System Restore at the top of the start menu, or you can type rstrui into the search box and hit enter. Your choice. You will immediate see a screen where you can choose to roll back the system to the last restore point. You can select “Recommended restore”, and just click next, or you can choose a different restore point. If you do choose a different restore point, you will see a list of restore points that you can choose from. Click one of them, and you will have to confirm and then restart your computer to roll the system back. If your system won’t boot If you can’t even get into windows, you can boot off the installation dvd, and choose the “Repair your computer” option on the lower left hand side. Click next on the next screen. Now choose System Restore from the System Recovery dialog. It will take a few seconds to come up, and you will see the same screen that you would see in Windows. Click next, and on the next screen select the drive that your copy of Windows Vista is installed on. Click Finish, and Vista will roll back to the previous restore point. Really pretty simple stuff. I absolutely recommend keeping the system restore feature on in Vista !

Using Windows Vista System Restore

Windows Vista has a feature called System Restore that automatically backs up registry and system files whenever you install new software or drivers. This feature is useful when you install evil software that makes your computer run really slow. But don’t worry, System Restore won’t remove Windows Vista.

Disable User Account Control(UAC) For Administrators Only

If you can’t stand the User Account Control prompts, but you’d still like to retain a little bit of security, you can disable it for Administrator accounts only. What we’ll be doing is actually changing Windows Vista to automatically elevate the privilege level for administrators without prompting. The nice thing about doing it this way is that regular users as well as Internet Explorer still run as regular users, and would still use the normal security mechanisms. To configure this setting on Windows Vista Business and Ultimate, you can use the Local Security Policy configuration.

  • Just type in secpol.msc into the Start menu search box and hit enter.
  • Now browse down to Local Policies Security Options
  • Find the following in the list: “User Account Control: Behavior of the elevation prompt for administrators in Admin Approval Mode” and double-click on it.
  • Change the setting to “Elevate without prompting”. You should be all done.
This is an easier method that you can use to do the same thing from the GUI interface.
  • Open up Control Panel, and type in user account into the search box.
  • You’ll see the link for “Turn User Account Control (UAC) on or off”. Click it.
  • Uncheck the box, and reboot your computer. You should be done with obnoxious prompts!

Emptying Windows Vista Temp Files Directory

Windows Vista Disk Cleanup wizard is really not all that bad, but I did find a small problem with it… It doesn’t fully empty your temp folder. It only allows you to delete temporary files that haven’t been modified in a week. If you’ve recently done a lot of editing or something that generates large temporary files, you may want to manually clean up. Just type in %TEMP% into the start menu search box, and hit enter. You’ll immediate be taken to the temporary files folder, where you can delete whatever you feel like.

Stop an Application from Running at Startup in Windows Vista

Back in the old days, there were a lot of places an application could hook itself to run at startup. You had to check the registry in more than one place, as well as your start menu. With Windows Vista, there’s a built-in panel that handles all that for you. To quickly get to this panel, you can open Control Panel, and then type “startup” into the search box. The link for “Stop a program from running at startup” shows up immediately. You could have also opened Windows Defender and fooled around with the menus until you find the right spot, but this seems quicker to me. Now you can see the Windows Defender screen that lets you manage the startup programs. You can choose to Remove or just Disable any startup item using this panel, as well as lots of other useful information so that you can see what each item is.

Fix for COM Surrogate Has Stopped Working Error in Vista

If you’ve been getting the error COM Surrogate has stopped working whenever you browse folders containing Divx avi files, it looks like the latest Divx update to codec version 6.5 fixes the issue, but it also seems to remove the thumbnails. If you want to upgrade, just use the divx update checker to grab the new version. Looks like it’s finally fixed, at least the error message is now gone, although I really wish they would have just gotten the thumbnails working instead.

  • If you are using Nero, you will need to update to version 7.7.5.1 to fix the problem. I think this is the source of the error for most people.
  • If you’ve upgraded Nero and Divx and still have the problem, you can try renaming the file C:Program FilesCommon FilesAheadDSFilterNeVideo.ax to NeVideo.ax.bak This will break Nero Showtime, however.

Enable Hidden BootScreen in Windows Vista

The Windows Vista BootScreen is pointless, but Microsoft decided to hide a more visually appealing boot screen that can easily be enabled with very little trouble. I’m not sure why they didn’t make the boot screen better.

1) Press Win+R, type msconfig and press Enter.

2) If User Account Control prompts you to allow the action, click on Continue.

3) In the "System Configuration" window, click on the Boot tab.

4) Select your Windows Vista installation and under "Boot options", check "No GUI boot". Press OK.

5) In the dialog that appears, check "Don’t show this message again", and then click on Restart.

6) Your computer will now reboot, and you will see the Aurora boot screen with text that says "Starting Windows Vista".

Note: You may get a Windows Defender error on the next startup. You can enable the system config utility using the tray icon and this error will go away.

Hide Desktop Icon Text on Windows Vista

Some icons are just obvious enough that nobody should need text below them to tell them what the icon is for. A good example of this is the icon for Internet Explorer. We’re all really used to it by now, and the text just makes it ugly. Just right-click on the shortcut, and choose Rename. Now hold down the Alt key and type in 255 on the keypad to the right of the keyboard. You can’t use the number keys right above the keyboard, they won’t work. If you have a laptop, you can turn on numlock and then use the little number keys next to the regular letters. (You know you always wondered what they were for)

For the first shortcut on the desktop, a simple Alt+255 will do. For the next shortcut, you’ll have to enter the combination twice (Alt+255, Alt+255). For the third, 3 times… you get the idea. The way this works is that the Alt+255 character is blank, so the shortcut filename is actually just named with a character that is completely blank. Since you can’t have two shortcuts or files named the exact same thing, the second shortcut will have to be named with two blank characters.

Now we have a sweet looking icon on the desktop, with no bothersome text beneath it. If you use this tip to rename a folder, you will not be able to rename the folder back using the right-click rename. I’m not sure why this is. What you’ll have to do is open a command prompt and change directory into the containing folder (For instance, the desktop folder), and run this command: ren “Alt+255” “NewFolderName” You will need to actually type the Alt+255 characters where illustrated in the command. It will appear as a space. Note that the Recycle Bin icon won’t work this way.

Power button default action

The default action for the Power button on the start menu in Windows Vista is Sleep, which isn’t necessarily useful for everybody. You can configure this setting easily by using the advanced power settings panel, which is a little tricky to get to normally, but we’ll take the shortcut. Open a command prompt (type cmd into the start menu search bar), and then type in the following: powercfg.cpl,1. You could also take the long route (Control Panel Power Options Change Plan Settings Change Advanced Power Settings) Once you get to this dialog, browse down as shown to “Power buttons and lid”

From here, you can change the options:

  • Power button action - Changes the hardware power button action
  • Start menu power button - Changes the power button on the Start Menu
You can change the power button to either Sleep, Hibernate or Shut Down, or even nothing for the hardware power button.

Tuesday, March 3, 2009

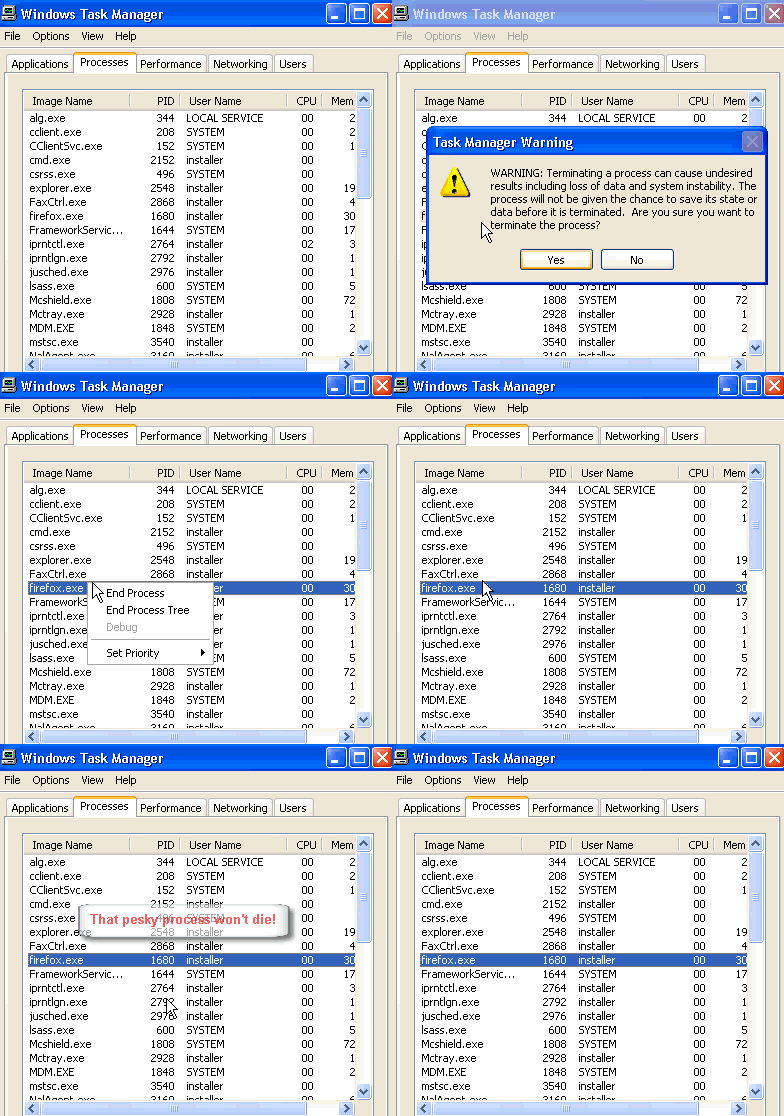
How To Kill Windows Processes That Won't Die

Ever have an application that just hangs and never returns to normal or terminate?

So you open up Windows Task Manager, find the application process, right click on it and select End Process.

Nothing happens! The process is still running and the dead application continues to cause high CPU utilization to the point where you can't do much with your computer.

You repeat the process. Nothing again. One more time…that process just won't terminate and die.

Now what?

Well, having pesky processes, that refuse to terminate and continues to hog CPU cycles, can be frustrating to the point where you just want to hit the power button and shut down. But that's too risky and more times than not will cause loss of data or system boot problems.

What you need is a utility that can kill and terminate stubborn processes, the first time, using PsKill from Microsoft Sysinternals.

PsKill requires no installation and is a stand alone executable that is run from the command line. It can kill process locally or remotely. PsKill is bundled with Sysinternals PsTools which is a collection of command line tools for Windows computers.

To use PsKill, you want to get things setup first:

  • Download PsTools from Microsoft site, and unzip to your desktop.
  • Open the PsTools folder and copy pskill.exe to your System32 folder. The reason for this is that pskill will be in your executable environment path so you can just type the command, with out specifying the full path to the folder and file location.
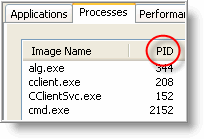
  • Next open Task Manager (right click on the taskbar then select Task Manager ) and make sure the PID column is visible (may need to use horizontal scroll bar to scroll to the right to see PID column).

If it is not visible, click on View \ Select Columns… and make sure PID (Process Identifier) is checked and select OK.

  • Now the next time you have an application that is hanging, and it's process will not end from Task Manager, make note of the process PID number in Task Manager.

  • Then open up a command prompt (click on Start \ Run and enter cmd in the run box) and type the following command:

pskill 1680

(just substitute 1680 with your PID number that you want terminated).

The process WILL terminate freeing your computer from application hell.

You should be able to re-open the application again. But be careful, killing processes this way may cause data loss with the application that was terminated (such as if you were using a text editor or Microsoft Word).

At least you won't have to reboot ;-)

Control And Monitor Your Child's Activities With Parental Controls

The Parental Controls in Windows Vista lets you easily control what your child can or cannot do, and monitor his/her activites using the built-in reports.

Step 1: Create A User Account For Your Child
Parental controls work by placing restrictions on a user account. Creating an account for your child so you can apply controls to his/her account without restricting yours:
1. Click on the Start Button and select Control Panel.
2. Click Add or Remove User Accounts under the User Accounts and Family Safety area.
3. Select Create a New Account.
4. Create an account for your child and ensure that Standard user button is selected.
5. The new account will now appear in the User Accounts window.

Step 2: Setting Up Parental Controls
Next, enable parental controls for the account you just created:
1. Click on the Start Button and select Control Panel.
2. Under the User Accounts and Family Safety option, click Set Up Parental Controls.
3. Select your child's user account to set up the controls.
4. Clicking the On radio button to enable parental controls.


Step 3: Configuring The Options

Configure the options to control what your child can and cannot do:

a) Windows Web Filter
1. Click the Windows Vista Web Filter option.
2. Check that blocking is enabled (turned on by default).
3. Edit the Allow or block list and enter the websites that are accessible to your child.
4. Click the "Only allow Web sites which are on the allow list" check box.

Block Web Content Automatically
You can apply automatic restrictions for your child here - a High or Medium level works best. Click on the radio buttons for a summary of what is blocked. If you'd opted to allow only websites that are on the Allow list above, this entire section is unavailable because site access is completely controlled by the Allow list.

Block File Downloads
This control restricts your child from downloading files from the Internet. For younger children, this is a good setting to enable because it prevents the possible download of information you may not want to them to have.

b) Time Limits
Selecting this option brings up a calendar where you can control when your child is allowed to use the computer. Simply click and drag to turn the desired hours and days blue in order to block these times.

c) Games Your Child Play
Select the Games option in the Parental Controls window to allow or disallow game playing by setting game ratings and allowing/blocking specific games on the computer.

d) Programs
You can allow or block specific programs on your computer, i.e. you have programs installed that you do not want your child to use. Choose this option in parental controls, and then click the radio button that appears to allow your child to only access programs that you have selected. You'll see a listing of all the programs installed on your computer - check the boxes of the programs that are accessible by your child.

Step 3: View Your Child's Activities
If you open parental controls for your child's account, you'll find an option to view his/her activities. This feature lets you review what your child's activites on the Internet, system changes that have been made, applications used, games played, e-mails that have been sent/received, instant messaging activities and many more. Click the report option, then use the categories on the left side of the window to see your child's activity.

Friday, February 27, 2009

Disable Aero inside Windows Vista

Disable Aero will in fact a positive effect and a negative. The good news is that memory consumption will be lower by about twenty megabytes. On the other hand, Aero is the tip of the iceberg in the composition of the display, i.e. support for the interface with the graphics card instead of the CPU.

Thus, memory consumption will be lower, but the smooth scrolling windows, transparency or the Flip3D should be abandoned.

Disable Aero in Windows Vista is really quite simple. Simply right-click on the desktop and select "Custom". We arrive on the properties panel of the display, and then click on "Color and appearance of windows."

By clicking on the blue line from the bottom (Open the properties of classical appearance), we could then choose from the dropdown the second option, "Windows Vista Basic." Suffice it then to implement the changes.

The interface will certainly be less pleasant, but it will also save precious minutes when you are using a laptop, especially if it is equipped with a graphics card type recent GeForce or Radeon.

An anti spyware hidden in Windows Vista

There are a number of software "spies" who spend their days scrutinizing your computer to inform their employers… To avoid this there are programs like Ad-aware responsible for removing them.

Windows Vista includes two anti-spyware: one "official" Windows Defender and another who does not enjoy the same reputation: "Malicious Software Removal Tool."

The first is useful, think well to keep activated. To do this, type "defender" in the pursuit of quick start menu and click windows defender. Try a search to verify that your system is clean.

The Malicious Software removal tool when asked to gymnastics more important to be used:

Also in the quick search Vista, type "command" and run the command prompt.

Once the window pseudo launched MS-DOS, type "mrt" wait and that the software is displayed.

Simply do searches on your computer to see that your system is finally healthy (or not).

I do not know what the analysis of the two programs differ, but as the saying goes: prevention is better than cure (and this is especially true for Vista).

Block the screen saver when using Windows Media Player

Normally when you play video content with Windows Media Player, the screen saver should not be set in motion. For some reason, it may happen it is run anyway, which is inconvenient and requires stop reading the content or moving the mouse, at the risk of again later.

Once launched Windows Media Player, press ALT, which will have the effect of bring up the menu. Then click on Tools, then Options. In the first "Player" tab of the window that opens, just check a specific case is NOT selected: "Allow the standby display during playback.

If this box is checked, uncheck it to no longer be alone

Activate the administrative share (C$, D$, etc.)

Since Windows Vista administrative share is not enabled by default, probably because of security reasons, therefore I will show you how to activate the administrative share.

Clearly, this trick is for people who use their computers at home (except professionals who can connect to the VPN and corporate network and log on to a Microsoft).

Launch First the Registry Editor using the module with real-time search from Start menu and then type "regedit" and click on search.

Once you are inside the register go to: HKEY_LOCAL_MACHINE \ SOFTWARE \ Microsoft \ Windows \ CurrentVersion \ Policies \ System

From there, make a right click on the "System" and, in the context menu that appears, click on "New" then "Key DWORD 32-bit", if you have Windows Vista 64 then type "Key DWORD 64-bit"

A new key appears. Select it and press F2 to change it's name.Name it"LocalAccountTokenFilterPolicy" and then double mouse click on the key and change it's value to "1"

Now, you can access hidden resources, here are some examples of use:

  • A Windows XP PC can access C$, D$, etc. on a Windows Vista
  • A Windows Vista PC (registry key unmodified) may reach C$, D$, etc. on a Windows Vista
  • A Windows Vista PC (registry key amended) does not have access to C$, D$, etc. on a Windows Vista (registry key unchanged)

If you want to access to these resources, even if you made good changes to the registry, you must have a valid user account with the necessary rights.

Detailed events for the start and end of sessions

Experienced users of a system like sometimes have additional details on the events taking place in their system. By default, Vista record starts and extinctions in a simplified way to oblivion as "Login" or "Extinction of the computer." The message clearly depends on the action taken in the Start menu, for example.

It is possible to apply the system of much more information about what is happening at startup or termination of a computer, and at the opening and closing sessions. Start by simultaneously pressing the Windows key and pressing R. The panel execution opens in which you state "gpedit.msc" and then confirm.

Go to "Setting up the computer", "Administrative Templates" and then finally "System". Get into the part of the right to get on "Messages detailed statements or normal." Theoretically, the function must be positioned on "Not configured". Simply double-click on it and choose "Enabled."

The diary of the events will be much more information, including start-ups and stops services.

Your children refuse to go to bed… blocking the PC

Windows Vista has a function called "Parental Control". So your children refuses to go in bed when you tell them, and it is all because they spend a lot of time on MSN or playing video games you can leave Vista to deal with that problem.

So how to use and setup Windows Vista Parental Control:

1. Type "parental control" in the search bar, Start menu and click on the associated module

2. Choose the computer user (your children) who refuses to go in bad.

3. Then click on "Time Limits":

4. Finally select the time slots where Vista will be unavailable by clicking on the boxes.

So if your child tries to open its session outside the permitted hours, Windows Vista reminds him politely that he would do better to go to bed. Similarly, if the session is open, the Vista will close without other forms of trial at a time defined.

In the parental control module you can also block certain games or programs, but also monitor user activity on the internet (downloaded files, last visited websites, etc…) thanks to the display of activity reports.

Thursday, February 26, 2009

Windows Vista Tricks about Collaboration

  • co-worker Collaboration.

    When one want to do a file processing with other users as well, but don't want to be one of them, Windows Meeting Space, new feature in Vista enables to start an impromptu collaboration session with other Vista users. One has to open Windows Meeting Space and start a session; it will automatically detect other Windows Vista users that are on the same sub-net. Invite them and once they accept the invitation, you can share it by dragging a document to the Handouts area on the bottom right, replicates it across the other meeting participants PCs. One just has to drag the file in the presentation area on the left side and start your processing while others watch.

    If any other user want to edit, pass control of the application directly to that user to make that edit for yourself.

  • XPS document

    This is an archiving format perfect for preserving content and for securely sharing information in any of the Vista application independently. To make any XPS document, open it in any application, and choose print option. Select Microsoft XPS Document writer in print option, and save the file. To open it double click on the saved file, it will open in the XPS Viewer, which is hosted by IE 7.

  • Share file/folder directly from your PC

    In Windows Vista one can share the file or folder on his PC with other individuals in the similar corporate network. In any explorer, choose file or folder to share and choose the option to Share. Enter the information of the one with whom you want to share that particular in the same network and give appropriate rights of access to them. Vista generates e-mail to the user who is using shared content automatically and auto-generated e-mail is having hyperlink to shared content, to make quick access.

Windows Vista Tricks about Search and Organize

  • About Windows Vista start menu

    when you look for any of the particular applications, Web sites, and e-mails, its easier and quicker in streamlined Windows Vista start menu. For finding any of the particular application or file, click Windows key on the keyboard or click start and type name of the file in Instant Search field you want. It will list the files contain that word at any position in their names.

  • Enhanced UI (User Interface)

    If PC supports the Windows Aero and you opened many files and see how easy it is to locate the needed file just by using the breakthrough Windows Flip by using ALT+TAB or Flip 3D using Windows key+TAB.

  • New Search explorer

    One can filter by type using the search pane and selecting Documents. One can choose to see your files in another way, via the new stack view. First you can explore each and every document by double clicking on its author name stack. Save this search s a new search older. For next search just select the Searches older link on the left side navigation pane, and double click on the search folder you need now.

Windows Vista Tricks about Internet Explorer 7

  • Print web content as a picture

    As the IE 7 provides shrink to fit printing feature, web sites will no longer get cut off while printing.

  • Browse multiple Web sites

    Tabbed browsing in IE enables IE window to run with the convenience of multiple WebPages. One can open a new webpage by clicking the empty tab on the toolbar. One an also do this by right-clicking any hyperlink and then select new tab. One can refresh the Tabs, to alter their functionality by right clicking individual pages or refresh it for a page or a group.

Customize / hide the Favorite Links list

The Navigation Pane is devided into two sections: Favorite Links & Folders.
The Favorite Links contains links to commonly used folders and saved searches.
You can add new links by dragging folders and/or saved searches into the list.
You can also drag folders from the Folders list to the Favorite Links section.
This is a convenient way to quickly access folders and searches you use often.
You can reposition a link by dragging it to the position where you want it to be.
To remove a link from the list, right-click on the link and select Remove Link.
Restore default links: right-click a blank area and select Restore Default Favorite Links.

Hide Favorite Links: drag the Folders list to the top of the Navigation Pane (see picture).

​ ​ ​ ​

Resize the Details Pane

Right-click on an empty part of the Details Pane and select one of the sizes:

Best Vista AntiVirus

All of the major AntiVirus companies (such as Norton, McAffee, Kaspersky, NOD, AVG etc...) all have Vista compatible versions of their software out at the moment. At launch, some older product versions were incompatible with some elements of Windows Vista.

It is important to note that there is no "best" anti-virus for Vista, but a selection of choices which will all suit different people better. Some people will only use Free Antivirus solutions, and other won't mind paying to protect their PC. For this reason, this article will highlight our current recommendations for different situations.

There is a great resource called AV-Comparatives that tests all of the major Antivirus packages every few months. The results change fairly often, but it is possible to spot providers with good antivirus software from this list.

Free Anti-Virus Software

The major free anti-virus packages are:

AVG Free
AntiVir
Avast

All of these choices offer reasonably good antivirus protection, but don't offer an all round security package in the free versions. Our current pick of the bunch would be AntiVir, due to it's performance in recent tests. It is worth reading the features of each application if you are restricted to free software, as each has its own advantages and disadvantages.

Paid Anti-Virus Software

There are a great number of paid antivirus software packages, the most popular ones being:

Norton
McAffee
Kaspersky
F-Prot
NOD32
Plus, paid versions of the "free" listings above

Our experience with both Norton and McAffee is bloated anti-virus software, both of which seemed to slow the system down. However, the recent Norton 360 package (offering all-in-one protection) has drawn some more positive comments. These packages may suit either a new computer user or a corporate environment, however computing enthusiasts and power users may want to look at other alternatives.

F-Prot and NOD32 are popular high-end anti virus solutions, with NOD32 in particular being highly recommended by computer experts.

Our own preference for an Anti-Virus package would be Kaspersky Internet Security (a stand along AV solution is also available). This provides all round security with excellent virus definitions and is reasonably priced. For a knowledgeable computer user, this package allows considerable customisation and is light on power usage.

Wednesday, February 25, 2009

Networking and Windows Vista Tutorial

As we briefly discussed earlier, the network interface for Windows Vista seamlessly integrates into many different types of connections. Regardless of how the Vista machine connects to the internet, the setup is quite simple. For instance, if the Vista machine connects to a router or hub, then the network should appear automatically if the Network Discovery feature is turned to On. Let’s check to ensure that is the case.

1. Open the Control Panel.

2. Select the Network and Sharing Center.

3. Check to ensure the green light is on for Network Discovery.

4. If it is not, turn on Network Discovery.

5. Enter the administrator password or click Continue if you are logged in as administrator.


The computer should automatically connect to any Network with the same workgroup name, but can also connect if the workgroup name is different. If an established network is in place at home, then the computer should use the same Workgroup name.

How to Change the Workgroup Name

The default Workgroup name for new installations is WORKGROUP. If for instance, the home network has a Workgroup name of SALLYSNETWORK, then we will want to change the Vista machine’s workgroup name to that.

1. Open the Control Panel.

2. Select the Network and Sharing Center.

3. Select the next to Network Discovery.

4. Select Change Settings next to Workgroup.


5. Click continue if logged in as administrator, or enter the administrator password.

6. Click the Change button, where it says To rename this computer or change its domain or workgroup, click Change.


7. Change the Workgroup name at the bottom of the screen.


8. Click OK.

The Workgroup name has successfully been changed. Once this is done, the Network discovery should automatically detect any shared folders and printers on the Network.

Let’s check to make sure we can see other folders and printers available on the Network.

1. Double click the Network Icon on the Desktop.


2. The available devices on the network should be accessible from this menu.

3. Double click any device to see the shared folders on that system.


Sharing Files in Windows Vista Tutorial

File and printer sharing in Windows Vista has intuitive features and can be easily configured. As with many households or businesses, certain computers control printers, while others store documents. Sharing between these computers can be helpful and is painless in Windows Vista.

Accessing File and Printer Sharing

1. Open the Control Panel under the Start Menu.

2. Select Setup File Sharing under the Network and Internet heading.

3. Be sure the options you wish to use are turned to ON in the Network Discovery area.

The Sharing and Discovery menu enables printer, file, media, password, and public folder sharing. If the feature has a lit green light and labeled on, then those features are working. To see the consequences of turning on and off each feature select the down arrow to view more about the settings.

Network Discovery
Turning this feature to On, enables the automatic detection of Workgroup computers on a network. Windows Vista automatically connects to these computers, allowing them to see the Vista machine and to interact.

File Sharing
By turning on this feature, users on the network can access files and printers current shared.

Public Folder Sharing
Turning this feature on allows users on a network to access publicly shared folders. The settings can be adjusted so only those with user account access can share files.

Printer Sharing
Turning this feature on enables users to have access to printers attached to this computer.

Password Protected Sharing
This option allows for only users with accounts to access the shared files and printers.

How to Share a Folder

There are many reasons why you may wish to share certain folders across your home network. For instance, the folder may hold your important documents that you wish to access from both your desktop and your laptop. Rather than keep the files on two separate drives, accessing the files and modifying them over the network makes changes and updates that much simpler.

The files you share with someone on the network or locally can be altered if you give the new user access to do so. However, you can limit the remote user’s access to only read the file and not have permission to write to the file. This is accomplished through the Share functionality.

1. Open the Windows Explorer (Start menu, then Computer).

2. Find the folder you wish to share using the folder tree on the left.

3. Click the folder.

4. In the preview pane on the right, select the folder with a single click.

5. Select Share from the toolbar on the top.

6. Choose the users who you wish to access this folder. If you want it accessible to anyone on the Network, then you must change the Network settings.

7. Select the type of Permissions for the added user: Reader, Contributor, or Co-Owner.

8. Click Share and wait for the sharing process to complete.

9. All the files are shared! Other local users or network users can now access these files.

NOTE: to undo file sharing, reverse the process, starting with selecting the folder and click on Share.

Vista Windows Meeting Space

Windows Meeting Space is a new feature of Windows Vista that lets users easily create secure sessions for sharing files and collaborating on work together. In this article I will also explain how administrators can lock down and manage this feature in an enterprise environment.

Windows Meeting Space (formerly Windows Collaboration) is a new feature of Windows Vista designed to make it simple for users to collaborate. Using Meeting Space, a user can share documents and applications with another user and even share use of their desktop. Collaboration sessions can be established over wired or wireless networks, and can even be established between two wireless hosts without the presence of an access point i.e using ad hoc wireless communications (Meeting Space is built upon peer to peer technologies and therefore does not require the presence of a server to operate the way Microsoft NetMeeting did). There's no intrinsic limit to the number of hosts that can participate in a session, but practical considerations limit collaboration to roughly ten hosts, each of which must be running Vista (Meeting Space is not available on Windows XP or earlier platforms and is not compatible with legacy collaboration tools like NetMeeting).

Setting Up Meeting Space

Let's do a walkthrough of setting up a Meeting Space session between two Vista computers. Note that the procedures outlined below are based on pre-release versions of Vista, so things may change a little when the final release version appears. Our test environment will consist of two Vista computers joined to a Windows Server 2003 domain, with user Bob Vista (bobv@test.local) on the first machine and Sue Vista (suev) on the second. Both are domain users but Bob is a standard user on his Vista computer while Sue is an administrator. This difference only means that different UAC prompts may be presented to each of them i.e. Bob will have to supply an administrator password while Sue can simply click Continue.

Bob will begin by starting a new Meeting Space session. But before we do this, let's look at the exceptions currently open in Windows Firewall on Bob's machine (Figure 1):


Figure 1: Firewall exceptions on Bob's machine

Bob now clicks Start, then All Programs, and then Windows Meeting Space. This opens the dialog box shown in Figure 2:


Figure 2: Bob is prompted to start some services and open some firewall exceptions on his machine

Bob now clicks Yes to the dialog prompt in order to set up Meeting Space on his machine (a UAC prompt appears so he'll have to enter the password for an admin account on his machine to continue). A new dialog appears asking him to confirm that he wants to set up People Near Me on his machine (Figure 3):


Figure 3: Bob is warned of the privacy considerations of enabling People Near Me on his machine

Warning:
Two users using People Near Me can have the same display name, so be careful using this feature in an unsecured environment to collaborate.

The Windows Meeting Space interface now appears, and Bob is initially asked if he wants to join an existing session. However, as shown in Figure 4 below there are no sessions open yet:


Figure 4: No sessions are open yet to join

Before we create a new session, let's see what exceptions have been opened in Windows Firewall to enable Meeting Space to work (Figure 5):


Figure 5: Exceptions have been opened in Windows Firewall

Three new exceptions are listed:

  • Windows Meeting Space
  • Windows Peer to Peer Collaboration Foundation
  • Connect to a Network Projector (not visible in Figure 5 above)

Tip:
If you want to know which TCP and UDP ports have been opened for these three exceptions, open Windows Firewall with Advanced Security (under Administrative Tools in Control Panel), select either Inbound Connections or Outbound Connections, and use Filter By Group to select the exception you want to examine.

Note that some additional services have also been started at this point, and using the sc query command before and after performing the steps above shows that the following services have now been started on Bob's machine:

  • Peer Networking Identity Manager (ptpimsvc)
  • Peer Networking Grouping (p2psvc)
  • Peer Name Resolution Protocol (PNRPsvc)

Anyway, Bob wants to start a new meeting so he clicks Start A New Meeting and specifies a password (Figure 6):


Figure 6: Starting a new meeting

Note:
Password requirements defined in domain policy will be enforced if Meeting Space is used in a domain environment.

The main Meeting Space interface is now presented to Bob, who can now invite others to join his meeting, start a shared session, add a handout, and so on (Figure 7):


Figure 7: Bob is ready to collaborate

Let's switch to Sue's machine now and go through the initial configuration steps for setting up Meeting Space. Once she's done this, her Meeting Space interface will display the meeting started by Bob but she won't be able to join it unless Bob invites her or provides her with the password for the meeting he started. Bob can send Sue an invitation as follows: Bob clicks Invite People in his Meeting Space interface (see Figure 7) and this opens an Invite People dialog (Figure 8):


Figure 8: Bob must invite Sue to the meeting he started

Bob now selects Sue's name and clicks Send Invitations. Note that by clicking Invite Others he can also send invitations by email or instant message. For example, Bob could create an invitation file (*.wcinv file) for the meeting, save it in his user profile folder (select Desktop then Bob Vista in Windows Explorer) and then share the file out for Sue or others to read it. Sue could then browse the \\computername\Users\BobV share on Bob's machine, double-click on the invitation, and join the meeting. In either case, once Sue has accepted the invitation she now shows up in Bob's Meeting Space interface (Figure 9):


Figure 9: Sue has joined Bob's meeting

Using Meeting Space to Collaborate

Once Sue has joined Bob's meeting, they can start collaborating. For example, Bob can send Sue a note by right-clicking on her icon in his Meeting Space interface and selecting Send A note. This opens the Send A Note window on Bob's machine (Figure 10):


Figure 10: Bob is sending Sue a quick note

When Sue receives the note, she can reply and continue chatting with Bob.

If Bob has handouts to share with Sue, he can click the Add button on his toolbar. When he does this a dialog appears saying that only one participant at a time will be allowed to modify the handout, that any changes made to the handout by any participant will be automatically made to each participant's copy of the handout, and that the original handout will itself not be modified during this process. For example, Bob can share the Budget.rtf file in his Documents folder, and when he does this it appears in everyone's Meeting Space interface (Figure 11):


Figure 11: Bob shares the budget with Sue

Or if Bob and Sue have mobile PCs, Bob can use his budget document to do a presentation. To do this, he right-clicks on the document in his Meeting Space interface and selects Share To Meeting.

Or by clicking on Share A Program Or Your Desktop, Sue can allow Bob to access an application running on Sue's desktop or even access his entire desktop using Remote Desktop Protocol (RDP). For example, if Sue is current running Microsoft Paint on her desktop, she can share this application for Bob to use. Once she's done this, Bob can see the program as shown from Figure 12, which illustrates Bob's desktop at that point:


Figure 12: Bob can see Paint running on Sue's computer

As shown by the menu bar, Sue is currently in control of Paint, but by clicking on the bar and selecting Request Control, Bob can ask Sue to relinquish control of the program to himself so he can run the program remotely.

Locking Down Meeting Space

Finally, if you're an administrator in an Active Directory environment, you can control Meeting Space using the Group Policy settings shown in Figure 13:


Figure 13: Group Policy settings for Meeting Space

In the ADMX files of my current Vista build, these policy settings are found under both Computer Configuration \ Administrative Templates \ Windows Components \ Windows Collaboration and under User Configuration \ Administrative Templates \ Windows Components \ Windows Collaboration, so you can control this feature either per-user or per-machine. The policy settings of interest here are:

  • Turn on Windows Collaboration: Lets you enable or disable this feature for users or computers in targeted OUs.
  • Turn on Windows Collaboration Auditing: Lets you enable or disable logging Meeting Space events to the event log.

Conclusion

Windows Meeting Space is an exciting new feature of Windows Vista, and administrators should start getting familiar with it now. Mobile users will especially find this feature useful for ad hoc wireless collaboration in business environments.

Vista Tips 'Shadow Copy'

Windows Vista Tips and Tricks Part 2

Vista Tips


Vista Tips - The funniest videos clips are here

Windows Vista Tips and Tricks Part 1

Change Workgroup

Workgroups are an easy way of grouping a collection of network PCs (for example, all of the computers in your house could be one). When you get your PC you may find that it is already of a workgroup and want to change it, or perhaps you need to join a new workgroup.

To start this process, press WINDOWS KEY + PAUSE/BREAK to load up the System information window. Then click Change Settings under the Computer Name, Description and Workgroup settings menu
Then, click Change:
Now type in your new workgroup into the appropriate box and then click OK:
You are now a member of the new workgroup and should be visible to other networked PC's.

Tuesday, February 24, 2009

Services You Can Disable

There are several services you can disable to help improve performance.

Desktop Window Manager Session Manager - Provides Desktop Window Manager startup and maintenance services.
If you don't plan on using Aero Glass, you can disable this service.

Diagnostic Policy Service - Enables problem detection, troubleshooting and resolution for Windows components
Set to Disabled

Diagnostic Service Host - Same as above

Diagnostic System Host - Same as above

Offline Files - The Offline Files service performs maintenance activities on the Offline Files cache, responds to user logon and logoff events, implements the internals of the public API, and dispatches interesting events to those interested in Offline Files activities and changes in cache state.

Terminal Services - Allows users to connect interactively to a remote computer. Remote Desktop and Terminal Server depend on this service. If you don't use either of these, then you can disable the service.

Windows Error Reporting Service - Allows errors to be reported when programs stop working or responding and allows existing solutions to be delivered.

Windows Search - Formerly this was the Indexing Service. Provides content indexing.

Changing the Sidebar

By default, the sidebar can take up a unwanted room on the desktop. You also can't put icons on the space it uses.
If you want to retain the ability to display the sidebar gadgets but also want full use of the desktop,
you can detach individual gadgets.

  1. Right-click the gadget you want to detach
  2. Click Detach from Sidebar
  3. Move the gadget wherever you want on the desktop
  4. Right click on the sidebar
  5. Click on Close Sidebar
  6. There will now be an icon in the system tray for the sidebar if you want to get it back

You can also get more gadgets on-line

GUI Performance

You can turn off some of the eyecandy to help speed of graphics performance

  1. Open the Start menu
  2. Right click on My Computer
  3. Select Properties
  4. Click on Advanced System Settings
  5. In the Performance section, click on the Settings button
  6. Click on Custom
  7. I usually only have:
    Show preview and filters in folder,
    Show shadows under mouse pointer,
    Show thumbnails instead of icons,
    Show window contents while dragging,
    Smooth edges of screen fonts,
    Use drop shadows for icon labels,
    Use visual styles on windows and buttons

Access Denied to Folders

If you are getting Access Denied errors when trying to open folders like Documents and Settings, Application Data, Local settings:

  1. Right click on the Folder
  2. Select Properties
  3. Click on the Security tab
  4. Click on the Advanced button
  5. Click on the Owner tab
  6. Click on the Edit button
  7. In the Change owner to box, highlight your account
  8. Check Replace owner on subcontainers and objects
  9. Click on Apply
  10. Click on Yes to replace all permissions
  11. Continue to click on OK until you

Resizing Partitions

Vista now has the ability to resize partitions.

  1. Right click on Computer
  2. Select Manage
  3. Click on Disk Management
  4. Right click on a partition
  5. Select Shrink or Extend depending on what you want to do

Note: As with all changes to partition sizes, have a good set of backups beforehand is a good idea

Adding the IE 7 Icon to the desktop

By default, the icon for the Internet Explorer 7 does not show up on the Vista desktop

  1. To add it back in again, a registry edit is needed.
  2. [HKEY_CURRENT_USER\Software\Microsoft\Windows\CurrentVersion\Explorer\HideDesktopIcons\NewStartPanel]
    "{871C5380-42A0-1069-A2EA-08002B30309D}"=dword:00000000
  3. You can download the reg file and then run it to do this automatically.
  4. Then log off and back on again

Allowing Network Access with Blank Passwords with Vista

Although you can log in locally without a password, by default, Vista does not allow network users to access the computer without a password.

To change this setting:

  1. Run gpedit.msc
  2. Go to Computer Configuration / Windows Settings / Security Settings / Local Policies / Security Options
  3. Double click on Accounts: Limit local account use of blank passwords to console login only
  4. Disable this option

Vista Opening Links to Another Web Browser Than IE

By default, when you click on a link to a web page, Vista will automatically use the Internet Explorer.
If you want it to use some other program like Firefox:

  1. Go to the Control Panel \ Programs \ Default Programs
  2. Click on Set your default programs
  3. Select the Web Browser you want to use
  4. Click on Choose defaults for this program
  5. Under Protocols, check HTTP
  6. Click on Save
  7. You can also check .htm and .html as well

Now when you click on links in an e-mail for example, your other web browser will start.

----

If your other browser does not show here, then you can make a change to the registry

Go to:
HKEY_CURRENT_USER\Software\Microsoft\Windows\Shell\Associations\UrlAssociations\http\UserChoice

Change it from IE.HTTP to Firefox.Url (if you are using Firefox for example)

No reboot is necessary

RoboCopy

RoboCopy or Robust File Copy for Windows is an enhanced file copy that far surpasses what you can do from either the Explorer or XCOPY.
It is a very robust command line driven program with a huge amount of switches and options. In addition to standard switches like /S for subdirectories,
Just a short list is:

  • /PURGE :: delete dest files/dirs that no longer exist in source
  • /MOV :: MOVe files (delete from source after copying)
  • /MON:n :: MONitor source; run again when more than n changes seen.
  • /MOT:m :: MOnitor source; run again in m minutes Time, if changed
  • /MAX:n :: MAXimum file size - exclude files bigger than n bytes.
  • /MAXAGE:n :: MAXimum file AGE - exclude files older than n days/date
  • /R:n :: number of Retries on failed copies: default 1 million
  • /TBD :: wait for sharenames To Be Defined (retry error 67)

Opening to a Command Prompt from the Explorer

If you are using the Windows Explorer, and want to open a folder to a command prompt:

  1. With the folder in the right hand panel
  2. Hold down the Shift key
  3. Right Click
  4. Select Open Command Window Here

Changing the Action for the Start Menu Power Button

At the bottom right of the Start Menu are three icons.
The left one (circle with a vertical line) is the Power Button
To change the action (Sleep, Hibernate or Power Off)

  1. Go to the Control Panel
  2. Select System Maintenance and then Power Options if it is the Default View or
  3. Select Power Options if it is the Classic View
  4. Under your current plan, click on Change plans settings
  5. Click on Change advanced power settings
  6. Click on the + by Power buttons and lid
  7. Click on the + by Start menu power button
  8. For the Setting, select Sleep, Hibernate or Shutdown
  9. Click on Apply and OK
  10. Now when you hover over icon, you can see the action it will take.

Turning Hibernate On or Off

If you don't need your computer to Hibernate or want to turn it back on again

  1. Open the Start Menu
  2. Right click Command Prompt
  3. Select Run as administrator
  4. To turn Hibernation off - powercfg -hibernate off
  5. To turn Hibernation on - powercfg -hibernate on
  6. If you turn it off, it won't even show on the Start Menu

Changing the Folders Vista Includes to Index and Search

When you search for files, the default setting for Vista is to search only in the User's Documents folder
To add to the locations that are included in Vista's Indexing

  1. Open the Control Panel
  2. Go to System and Maintenance
  3. Go to Indexing Options
  4. Click on the Modify button
  5. Click on the Show all locations button
  6. Check the Drives or Folders in Drives that you want to include
  7. Click on the Close button

For more details with screenshots see Vista Indexing and Search

Changing the Windows Explorer Columns

By default, the Windows Explorer displays file's Name, Date Modified, Size and Type
If you want to Add or Change these,

  1. Right click on any of the columns
  2. Check or Uncheck any times you want
  3. Click on More to display an extremely rich list of options to display

To Move columns

  1. Left click and drag the column to the location you want

Installing Vista With No Product Key

You can install Vista with no product key and have 30 days to evaluate it

  1. Boot from the DVD and start the installation
  2. Select the Language, Time and Currency, and Keyboard
  3. Click on Next
  4. Click on Install Now
  5. Don't enter a Product Key
  6. Uncheck Automatically activate Windows when I'm online
  7. Click on Next
  8. Click on No to confirm you do not want to enter a product key
  9. Highlight the version of Vista you want to install
  10. Check that it is the same edition you have purchased (if you want to enter in a product key at a later time).
  11. Click on Next
  12. Check accept the license and terms
  13. Click on Next
  14. Install a clean copy and continue as with a regular install

Changing the Desktop Icon Size

By default, the icons on the desktop are quite large.
To change the size

  1. Right click on the Desktop
  2. Select View
  3. Set it to Classic Icons

  1. You can also hold down the Control key while the desktop is displayed
  2. Use the wheel mouse to make the icons larger or smaller
  3. This gives more control

Displaying a Checkbox For Selecting Files and Directories

Normally when you want to select a file or folder, it is somewhat difficult to determine exactly what is check and what isn't.

To change this:

Start the Windows Explorer

Go to Tools / Folder Options

Click on the View tab

Check the box for Use check boxes to select items (it's towards the bottom)

Easy Access to Clock / Calendar

By left clicking on the clock in the system tray, you have a quick view of the clock and the current month's calendar.

You can then scroll for preceding and upcoming months as well

Quick Access to Programs in the Quick Launch Bar

If you want to quickly access any of the programs in the Quick Launch bar,
Press the Windows key with the number corresponding to the location of the program.

For example, if Outlook is your fourth item, you would press Windows+4

Changing the Location of the Documents Folder

If you would like to change the location of the Documents folder to a new location:

  1. Create the new location's folder
  2. Click on the Start button
  3. Right click on My Documents
  4. Select Properties
  5. Click on the Location tab
  6. Click on Move and select the new location you just created

For example, I prefer to keep all my data on a second partition for easier backup. My Documents folder is moved to D:\Data\Documents

Shutdown Icon is Missing

If the left button is missing so you can't assign it to shutdown your computer,
you may need to make a change to your Group Policy

  1. Start
  2. Run
  3. regedit
  4. Go to HKEY_CURRENT_USER \ Software \ Microsoft \ Windows \ CurrentVersion \ Policies \ Explorer
  5. On the right hand panel, delete the key NoClose
  6. Log off and back on again.

---

Another method is using the Group Policy Editor

  1. Start
  2. Run
  3. gpedit.msc
  4. Go to User Configuration / Administrative Tools / Start Menu and Taskbar
  5. In the right hand panel, double click on Remove and prevent access to the Shutdown, Restart, Sleep, and Hibernate commands
  6. Double click on Disabled
  7. Click on Apply and Ok
  8. Log off and back on again.

Changing the Size of the Details Pane

When you use the Windows Explorer to view the files on the computer, a details pane opens along the bottom.

  1. To change the size or hide it all together, right click on an open area
  2. Select the option you want
  3. If you delete the Details Pane, you can get it back by clicking on Organize / Layout / Details Pane

Reliability and Performance Monitor

If you want to get a reasonably detailed view of the compter's CPU, Disk, Network and Memory access,

Start / reliability

From here there is quite a lot of information you can see about your computer.

Organizing File Display into Groups

Normally when you look at files in the Explorer, they are commonly shown alphabetically or by type

There is another way you can view them which is in Groups

  1. Start the Windows Explorer

  2. Go to a directory that has different types of files

  3. Hover over Type in the bar at the top

  4. Click on the down arrow

  5. Click on Group

  6. Now you will see your files sorted by Group with the heading for each group type clearly shown. This heading makes it easier to see what type of files it is.

Organizing File Display into Stacks

Normally when you look at files in the Explorer, they are commonly shown alphabetically or by type

There is another way you can view them which is in Stacks. This is different than organizing into Groups

  1. Start the Windows Explorer

  2. Go to a directory that has different types of files

  3. Hover over Type in the bar at the top

  4. Click on the down arrow

  5. At the bottom, click on Stack by Type

  6. Now you will see icons representing the different file types. You won't see the actual files at this point

  7. Clicking on one of the icons will show the files that are in that type

  8. If you Stack by Name, files will be grouped into 0-9, A-H, I-P, and Q-Z

Access My Computer (or any Folder) from the Toolbar

Often I want to access files on My Computer but the desktop is full of Windows.
Rather than having to close them down, it is easy to add My Computer to the toolbar

  1. Right click on an open area of the toolbar

  2. Select Toolbars / New Toolbar...

  3. Click on Computer in the left panel

  4. Click on Select Folder

  5. Now when you click on the >> on the new toolbar, you will see a listing of all your hard drives.

  6. Of course you can add any folder you want in the same manner.

Disabling Unneeded Windows Features

There are likely Windows Features running on the computer you don't need.

To see what these may be and make any changes you want:

  1. Start / Control Panel

  2. Programs and Features

  3. Click on Turn Windows features on or off

  4. It typically takes a little while for this window to populate

  5. Hovering the mouse over an entry gives a short description of it

  6. From here you can check or uncheck any entries you want.

  7. For example, you may not need Windows Fax and Scan

  8. Click the OK button when you are done

Another Way to Open Command Window Here

When using the Windows Explorer, and you want to open a CMD prompt to a particular directory,
another way to accomplish this is to hold down the Shift key while you right click on a directory in the right hand panel

Then select Open Command Window Here

Changing the Windows Border Padding

By default, Vista has a somewhat thick border around the windows. If you want to reduce this:

  1. Right click on an open area of the desktop

  2. Select Personalize

  3. Click on Window Color and Appearance

  4. If you have Aero then Open classic appearance properties for more color options

  5. Click on the Advanced button

  6. In the Item section, select Border Padding

  7. Change the size

  8. Apply / Ok

Turning On/Off Thumbnail Preview

If you want to show a thumbnail preview of graphic files

  1. Go to the Control Panel

  2. Select Folder Options

  3. Select View

  4. Uncheck Always show icons, never thumbnails

  5. To turn this off, check the box

Quick Access to the TEMP Directory

If you want to quickly access a user's TEMP directory:

  1. Click on the Start (Search) button

  2. Enter %temp%

  3. This will bring up the currently logged on user's TEMP directory

This can be useful when you want to clean out unneededitems in that directory which can often accumulate.

Turning Off Vista's Built-In CD Burning

Since most computers come with 3rd party programs that are easier to use than Vista's CD/DVD burning,
you can turn this off with a simple registry edit.

  1. Start Regedit

  2. Go to HKEY_CURRENT_USER\ Software \ Microsoft \ Windows \ CurrentVersion \ Policies \ Explorer

  3. Create a new DWORD key NoCDBurning

  4. Give it a value of 1

  5. Log off and back on again

Download Reg File

Searching a Folder

With Vista, when viewing a directory, you can configure it to automatically start searching when you type in text,

  1. Go to the Control Panel

  2. Select Folder Options

  3. Click on the View tab

  4. Scroll to the bottom

  5. Check Automatically type into the Search Box

Now when you are in a folder and simply start typing in text, Vista will start a search

Repairing a Corrupted Winsock Registry Entry

If you suspect you have a corrupted Winsock Registry Entry (one of the symptoms is that you can't connect to the Internet), run:

netsh winsock reset

and then reboot

Fixing Corrupted TCP/IP Files

If you suspect you have corrupted TCP/IP files, run:

netsh interface ipv4 reset
netsh interface ipv6 reset

Then reboot

Cleanup Files After Upgrading to SP1

During the upgrade to SP1, Vista makes a backup of all the files it is upgrading. This is in case you want to uninstall SP1 for any reason.
If you have no problems with SP1 and want to remove the backup files, run:

vsp1cln.exe

You will be prompted if you want to remove the files. Simply press the Y key.

Showing Super Hidden Files

Even with the Folder options configured to show hidden files, there are super hidden files that you still can't see.
To view them:

  1. Start Regedit

  2. Go to HKEY_CURRENT_USER \ Software \ Microsoft \ Windows \ CurrentVersion \ Explorer \ Advanced

  3. In the right hand panel, scroll to SuperHidden

  4. Change the value to 1

  5. Reboot

Getting More Information from Programs and Features

When you go to the Control Panel's Programs and Features page, normally you get a view somewhat similar to what was available with XP.
With Vista you can customize the information shown on that page.
For example, normally you only see the Name, Publisher, Installed On, and Size.

  • If you right click on the menu bar with these names, you can add in other useful information like Support Link, Used and Version.

  • Support Link lets you directly go to support for a particular program.

  • You can then sort by Used to see which programs you use the least. Perhaps there are some you can remove to help keep a cleaner system.

  • You can look at the Version to make sure you are current with your applications.

Using the Windows Explorer Favorites Links

One of the useful features of the Internet Explorer is the Favorite Links section.
It allows you to put shortcuts to your commonly used folders on your hard drive.

  1. Simply start the Explorer

  2. In the upper left hand panel is the Favorite Links section

  3. Simply drag shortcuts from whatever folders you want to this panel

  4. You can even organize them so the most commonly used ones of these are at the top.

Changing My Pictures and My Music

Normally, when you open up the Start Menu, below Documents, is shown My Pictures and My Music

If you want, you can change these to any other locations you may use more frequently.

  1. Start Regedit

  2. Go to HKEY_CURRENT_USER\Software\Microsoft\Windows\CurrentVersion\Explorer\User Shell Folders

  3. On the right side, change the location for My Pictures and My Music

  4. This new location will now show on the start menu

Changing the OEM Information

When you right click on My Computer, you can see information for the Manufacturer, Model, Phone Number, Support Hours and Web Site

If you want to change these:

  1. Start Regedit

  2. Go to HKEY_LOCAL_MACHINE\SOFTWARE\Microsoft\Windows\CurrentVersion\OEMInformation

  3. From here you can make any of the changes you would like.

Fixing the Boot Record

If the boot record need to be repaired

  1. Boot from the Vista installation CD
  2. Although they are likely set correctly, select a language, a time, a currency, a keyboard or an input method, and then click on Next.
  3. Click Repair your computer
  4. Click the operating system, and then click Next.
  5. In System Recovery Options dialog box, click Command Prompt.
  6. At the command prompt, type in Bootrec with the option you want , and then press the ENTER key.

/FixMbr

The /FixMbr option writes a Windows Vista-compatible MBR to the system partition. This option does not overwrite the existing partition table. Use this option when you must resolve MBR corruption issues, or when you have to remove non-standard code from the MBR.

/FixBoot

The /FixBoot option writes a new boot sector to the system partition by using a boot sector that is compatible with Windows Vista. Use this option if one of the following conditions is true:
The boot sector has been replaced with a non-standard Windows Vista boot sector.
The boot sector is damaged.
An earlier Windows operating system has been installed after Windows Vista was installed. In this scenario, the computer starts by using Windows NT Loader (NTLDR) instead of Windows Boot Manager (Bootmgr.exe).

Typically you would run either bootrec /fixmbr or bootrec /fixboot

Changing the Registered Owner and Registered Organization

If you want to change the registered owner and organization:

Start Regedit

  1. For 32-bit - Go to HKEY_LOCAL_MACHINE\SOFTWARE\Microsoft\Windows NT\CurrentVersion

  2. For 64-bit - Go to HKEY_LOCAL_MACHINE\SOFTWARE\Wow6432Node\Microsoft\Windows NT\CurrentVersion

  3. From here change the RegisteredOwner and RegisteredOrganization

How to make your Windows mail email into a webpage with links and pictures

There are many benefits to writing an email in rich html format in Windows Mail or Outlook Express. One of the main benefits would be that you can insert links to websites. Another great fact is that you can also insert a picture into your email so the person receiving the email sees the picture straight away. Writing an email in HTML rich text format also can make your email look like a professional webpage.

How to make your Windows mail email into a webpage with links and pictures

  1. Open Windows Mail
  2. Click on the create mail icon at the top
  3. Got to the format menu and choose rich text HTML from the menu
  4. Now a HTML editor tool bar will appear just above where you will write the content of your email.

How to insert a link into your email?

You can make your text into a html link. So therefore you can link to a website and user anchor text. For example you can make this Tips4pc link to the Tips4pc website, instead of having this ugly link http://www.tips4pc.com

  1. Select the text in the content of your email by making it blue.
  2. Then press on Create a hyperlink icon in the HTML toolbar.

How to insert a picture from your hard drive or one stored on the internet?

Not only can you insert pictures from your hard drive but you can also insert pictures and graphics that are stored on the internet. Just simply go to the picture you want in your email. Right click on it and choose properties. Then copy the url of the picture. So when you need to say where the picture is stored, you can paste that url in and the picture will appear in your email.

  1. Click on the insert picture icon.
  2. To insert a picture from your computer click on browse to find a picture on your hard drive.
  3. To insert a picture that is stored on the internet paste the url into where it says location.


Change the volume of individual programs in Windows Vista

Sometimes a cool feature can be staring you in the face. However if you are an explorer like me then you would have already realised that in Windows Vista there is a new enhanced volume control mixer.

Where is the Windows Vista Volume control?

The volume icon is usually in the notification area in the task bar in the right hand corner of your screen.
How to show the volume control icon in the notification area on the taskbar:

If it is not there see how to Add or remove icons from your Windows Vista notification area This article will help you bring back the volume control icon.

How to change the volume on each individual program in Windows Vista:

All you have to do is click the volume icon in your system tray, and then click on the word Mixer at the bottom. Then you will see your different programs listed each with a different volume control.

Watch this video tutorial on how to change the volume of individual programs in Windows Vista.


Choose which user account you want to login to automatically when Starting Windows Vista..

No one wants to enter thier username or password in everyitme they want to use the computer. Especially if it is a home computer that has not got important information to protect. Logging in to your user account atromatically is a lazy persons dream, however it also makes it easy for anyone to login to your computer. This removes your password protection, so when the computer is turned on it goes straight inot the user account that it was programmed to open.

How to set an account to open automatiacally:

  1. In Windows Vista fo to the start menu.
  2. Choose run from the menu or go to the search bar at the botton.
  3. Type in control userpasswords2 and press enter.
  4. The User Accounts window will appear. (screenshot below)
  5. Now select a user name by making it blue.
  6. Remove the tick in the box next to Users must enter a user name and password to use this computer.
  7. Press apply. You will be asked to enter the password for this account. If there is no password then leave it blank.
  8. Press ok and exit.
  9. Restart your computer and it will login to that account automatically.
  10. If you wish to change the account to login to then return and selct the user account that is on automatic, tick the box again, then start from scratch to change the settings to another account.